
Remove the background, set Background to Clear, and export as PNG. Save or share the exported file itself. A screenshot captures the preview background and loses transparency.
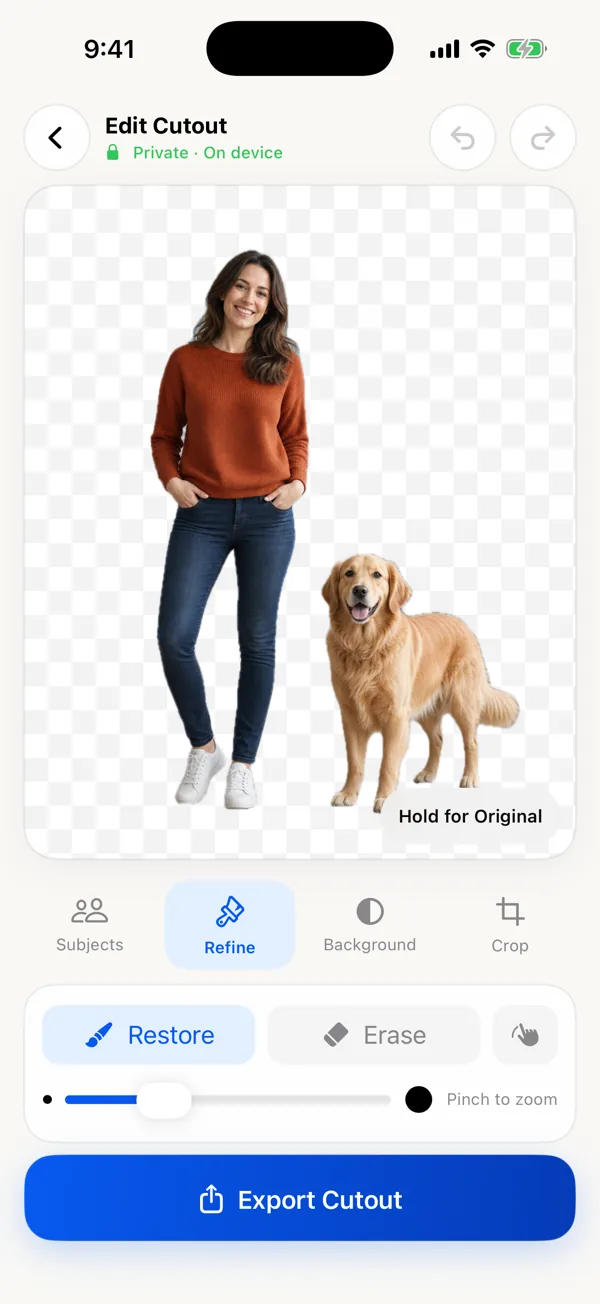
What transparency means
A digital image normally stores red, green, and blue values for every pixel. A transparent image adds an alpha value that says how visible each pixel should be. Fully transparent pixels let the eventual background show through; partially transparent pixels keep soft edges such as hair and fur from looking cut out with scissors.
Editors commonly display transparency as a gray-and-white checkerboard. That pattern is not baked into the export. It is a visual convention so empty areas remain visible while you work.
Create the file
- Choose the source photo and let the app create the foreground mask.
- Keep the subject or subjects you want.
- Open Refine and inspect narrow edges at a useful zoom.
- Leave Background set to Clear.
- Open Export and select PNG, or leave the file format on Auto when Clear is selected.
- Share the file or save it to Photos.
Why a transparent PNG can look white
Some preview screens use white behind transparent pixels. Send the file into a design app or place it over a colored background to verify it. If the image was exported as PNG with Clear selected, a white-looking preview does not necessarily mean transparency was lost.
Another common problem happens after export. Messaging apps, social networks, and image optimizers may convert a PNG to JPEG. Share the file as a document when preserving the exact format matters.
Keep the original resolution
A fast editor can show a smaller preview while you work and return to the original image for the export render. This avoids making every brush movement operate on a large image while preserving the source dimensions in the finished file. Check the exported pixel dimensions when a marketplace, print workflow, or design template has a requirement.
Check the exported PNG before sending it
- Open the exported file in an app that supports transparency.
- Place it on a colored background. The new color should show through the removed area.
- Inspect hair and fur on both a light and a dark background to catch unwanted edge halos.
- If you see a fixed white rectangle, check that you chose Clear and PNG, then export again. Renaming a JPEG to .png does not add transparency.
Local Background Remover is a one-time app purchase with full-resolution export and no subscription. Get Background Remover: PNG Cutout on the App Store.
When PNG is the wrong choice
PNG is excellent for cutouts, logos, graphics, and images that need transparency. A high-resolution photographic PNG can be much larger than a JPEG. If the background is final—white, black, or another solid color—and file size matters, JPEG may be more practical.